Tissage V3

Pour la deuxième version du tissage Maria utilisait un cadre de toile et des petites vis au lieu du carton de la première version.

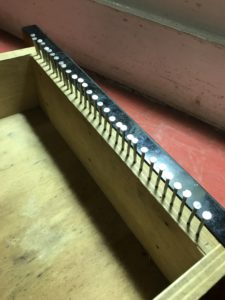
Alors, j’ai décidé d’expérimenter avec un vieil tiroir que j’ai trouvé dans la rue. Et aussi, je voulais un moyen de rendre le tissu plus ressemblant à du fil.

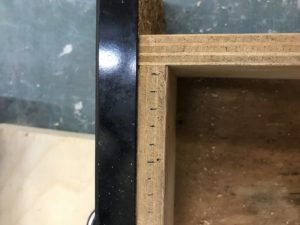
Marquez tous les 75 mm le long des bords supérieur et inférieur. Gardez-les alignés les unes avec les autres, car c’est là que vous placerez les vis

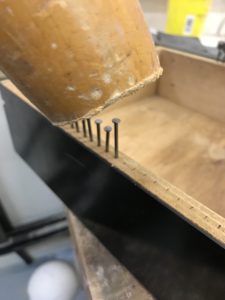
Vis marteau de 25 mm à chaque marque sur le haute et le bas.

Maintenant il est prêt à tisser.

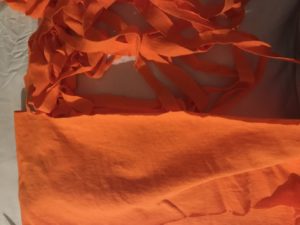
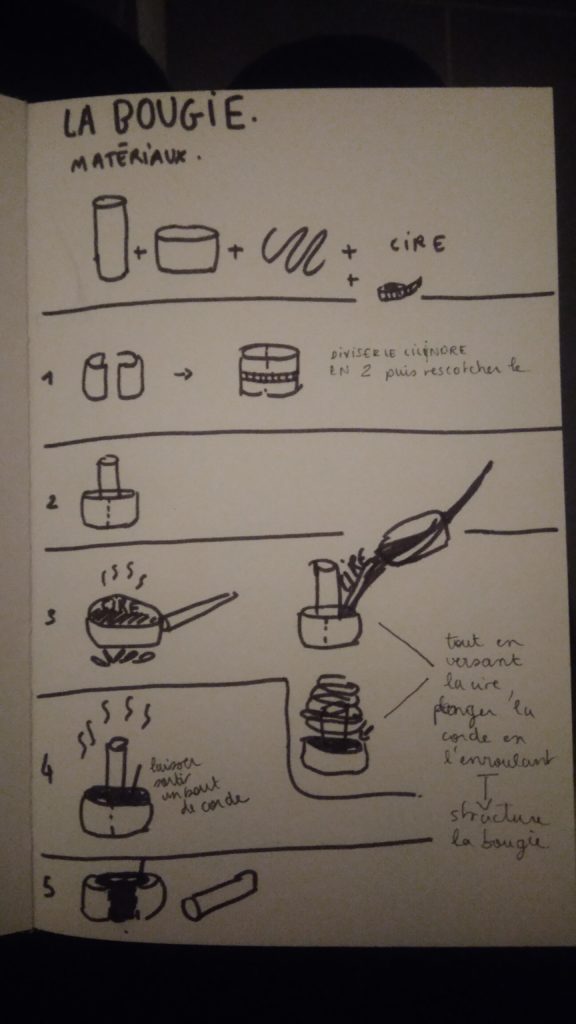
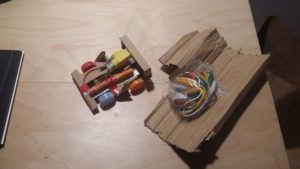
Coupez une chemise en coton et polyester mélangés en lanières de 10-20 cm de large.

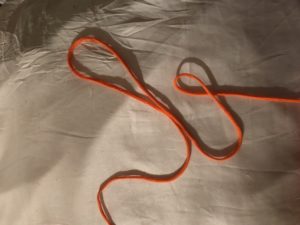
Étirez la bande de tissu jusqu’à ce qu’elle devienne une longue pièce mince ressemblant à une ficelle.

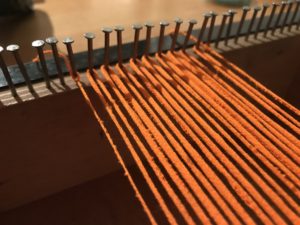
Attachez la ficelle à la vis dans le coin supérieur gauche. Enroulez la ficelle d’avant en arrière entre les ongles supérieurs est inférieurs. Terminez en attachant la ficelle dans le coin inférieur droit.

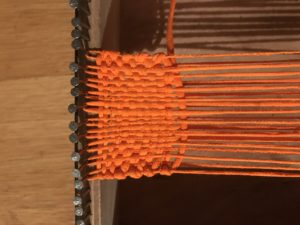
Tissez une autre ficelle aussi longtemps que vous voulez.

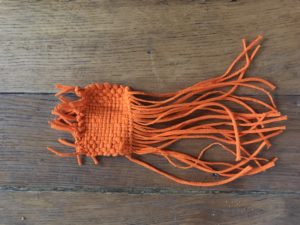
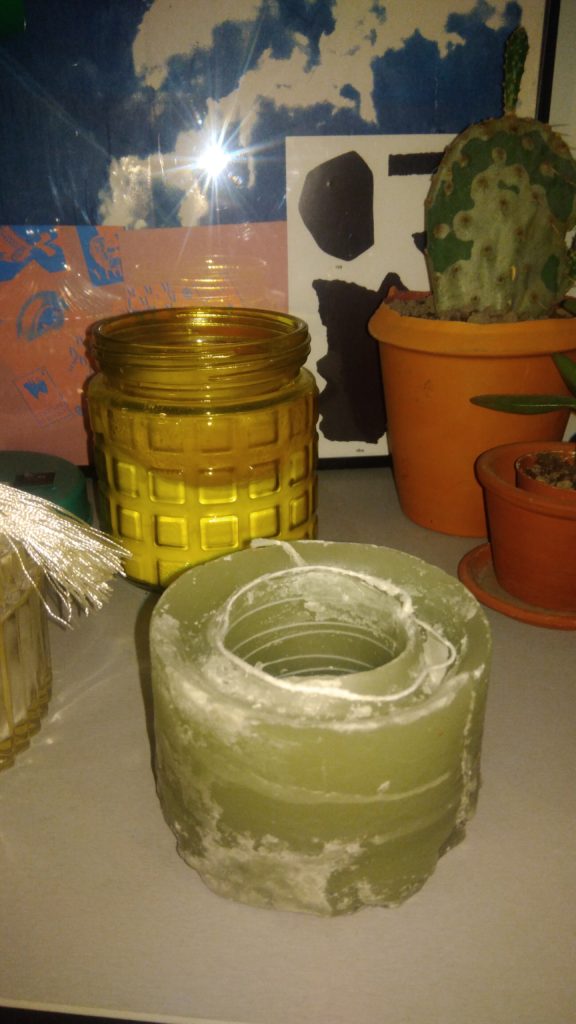
Le première tissage.


Mes pensées:
Si je ferai la quatrième version, je changerais l’espacement des vis. Les vis dans le tiroir sont à .75cm de l’une à l’autre, mais cela fait un tissage très serré. Il est trop serré pour un tissage à la main.

Carboard V2

J’ai repris l’instructable de la voiture fabriqué précédemment par Maria pour en modifier certaines parties.

Un des changement majeur a étais le remplacement des roues en carton par des bouchons en plastique récupés. Egallement on retrouve un moteur plus véloce de 5V. Enfin, j’ai donné à la voiture une esthetique plus sportif avec son aileron arrière.

Malgrès les changement, je conseil de garder le moteur 3V de Maria car il es plus léger et que l’axe rotatif a une taille plus convenable.


05-11-2019

Le « workshop »/brainstorm/discussion qu’on avait en classe, il était tres bizarre parce qu’il y avait une barrière du langue. Ce sujet est assez difficile à comprendre sans avoir à traduire dans une autre langue. Mais je pense qu’il y avait encore beaucoup de bonnes idées et discussions.

J’ai oublié la permaculture.

translation of the other post

google chrom transalted what I wrote to bad portuguese without me asking for it, here you go the original version. I’m working on translating it to french


GOAL:
A set of rules for kids from 10 up to learn how to do a
car with mainly cardboard using a rc motor of 3-5v. The
goal is to teach the child how to do baisc conections
and incentivate the creation of other objects
MATERIALS FIRSTLY USED:
2 motors RC
2 bateries
wood
plastic
tape
MATERIALS THAT I WANT TO USE:
1 motor RC
1baterie
cardboard
tape
RESEARCH TOOLS:
Youtube
instructables
wikihow
pinterest
MOST USEFUL HOW TO’S:
-how to make a RC Car
-how to make a micro rc car
-how to ake a miniFPV PR car- FPV RC Tank
How car steering works- Rack& Pinion
–How to make Hydraulic Powered Robotic Arm from
CArdboard
-/id/smart-car-1/
-/id/toy-cruiser/
-3 ways to make an RC Car Faster
RESERATCH CONCLUSION:
-use only one motor by using an elastic band to make
both back weels spin
-melted straw on cardboard with wood stick inside attached
to the weels
STORES IN PARIS TO BUY ELECTRONICS AND OTHERS
electronics:
Saint Wuentin Radio
others:
PROTORYPE TRIALS and materials
-cartolina duplex (to weak)
-cardboar
-roler paper (to fragile for weels)
-super glue (DOES NOT WORK ON CARDBOAR)
-aftepunke – good for substituiting black tape
– straw and chinese stiks as the differential
-rubber elastic bands
CONCLUSION
– cardboard is not strong enough in the way I’m using it
to create tension enough between the engion and the
weels
– the cutting of a real car model is to hard for the age of
the user.
WHAT TO DO NEXT:
-trying a simplified version or just a base with a different
box for the motor and batteries
-search a way to keep the motor still, even with the tension
from the elastic
-find a way to put the cardboard together in a stronger
way


OBJECTIF :

UN ENSEMBLE DE REGLES POUR DES ENFANTS DE 10 ANS, POUR FAIRE L`ORGANIGRAMME D`UN MOTEUR DE 3 A 5 CV RC. CE JEUX EST UN JEUX DE PRODUITS.

MATÉTRIAUX PREMIER USÉS

  1. DEUX MOTEURS RC.
  2. DEUX BATÉRIES EN PLASTIQUE
  3. BOIS

MATÉRIAUX QUE JE VEUX UTILISÉ :

  1. UN MOTEUR RC.
  2. UNE BATERIE
  3. CARTON

SOLUTION POUR MON RESENT PROBLEME : DES JOUETS DOMESTIQUE – REICYCLÉS (YOUTUBE)

CONCLUSION ET RECHERCHE

  1. UTILISATION JUSTE D`UN MOTEUR
  2. UTILISATION UNE BAND ELASTIQUE POUR FAIRE TOURNER  LES ROUES
  3. CARTON

MAGASINS À PARIS POUR ACHETÉS DE L`ÉLECTRONIQUE ETC. _

  1. ELECTRONIQUE
  2. RADIO SAINT WUETIN

AUTRES MATERIAUX :

  • ESSAIES PROTOTYE ET MATERIAUX
  • CARTON DUPLEX (FAIBLE)
  • BOBINE CARTON (FAIBLE)
  • SUPER-COLLE (NE FONCCIONNE PAS SUR CARTON)
  • AFEPUNKE
  • BÂTONS CHINOIS
  • ELASTIQUE

CONCLUSION

  • LE CARTON N`EST PAS SUFFISAMMENT FORT (O RESTO NÃO PERCEBI)
  • LE MODÉLE DE COUPE D`UN CAMION EST DIFICIL DE FAIRE PERSONALISÉ À L`AGE DE LÚTILISATEUR

FAIRE ENSUITE :

  • ESSAYÉ  UNE VERSION SIMPLIFIÉ COMME BASE , APEINE AVEC UNE CAISSE POUR LE MOTEUR ET LES BATÉRIES
  • CHERCHER UNE FORME DE MANTENIR OU FIXER LE MOTEUR EN TENSION AVEC LA BANDE ELASTIQUE
  • TROUVER UNE FAÇON DE LAISSER SUR LA CAISSE EN CARTON , PLUS FORT (

SOLUTIONS :

  • CARTON POUR LES DESSINS\MODÈLES TRANSPORTÉS
  • MATÉRIAUX , MAILLE EN TRICOT , MAIS FACILES DE CUPÉ AVEX X-KNIFE
  • PISTOLET À COLLE – BOM POUR COLER TOUS.  ET AUSSI POR FIARE FONDRE LES BOBINE DE CARTON EN SECURITE